Free script: Easy focusing while animating a camera in Blender

While animating a camera, it is often desirable to quickly set the focus on a specific object. The “Focus on Object” field in Blender is incredibly useful for this, allowing the quick selection of a focus object via the eyedropper tool. However, once this link is set, it remains permanent. If the link is severed, the focus on the specified object is lost. I sought a solution that would allow me to capture the correct focus distance based on the focus object before severing the link. This led me to develop a script that not only calculates but also sets the “Focus Distance” field automatically to the appropriate value. This script triggers when the focus object property changes from empty to populated. It then calculates the distance, logs it in the console, and sets the focus distance. Now, you can break the link to the focus object while retaining the focus based on the last calculated distance.

How to Use the Script:

  1. Open Blender and Set Up Your Scene: Ensure your scene contains at least one camera and other objects you might want to focus on.
  2. Open the Scripting Tab: Navigate to the ‘Scripting’ tab in Blender to access the Python console and scripting area.
  3. Paste the Script: Copy the script provided below and paste it into a new text editor within the Scripting tab.
  4. Run the Script: After pasting, run the script by pressing the ‘Run Script’ button. This will activate the script, and it will start monitoring changes to the focus object property.
  5. Use the Camera’s Focus Object Field: Go to your camera’s object data properties and under the depth of field settings, use the eyedropper to select a focus object from your scene. The script will automatically update the “Focus Distance” to match the distance to the selected object.
  6. View the Output: Check the console (located in the same Scripting tab) to see the printed focus distance. This value is also automatically set in the camera’s “Focus Distance” field.
  7. Sever the Link If Desired: You can now sever the link to the focus object without losing the focus distance, as it has been set manually based on the last calculation.
  8. Here is the script:

import bpy

# Global variable to keep track of the last focus object
last_focus_object = None

def update_focus_distance_if_needed(scene):
    global last_focus_object
    camera = scene.camera

    if camera and camera.data.dof.use_dof:
        current_focus_object = camera.data.dof.focus_object

        # Check if the focus object was None and now is set
        if last_focus_object is None and current_focus_object is not None:
            # Calculate and update the focus distance
            camera_location = camera.matrix_world.translation
            target_location = current_focus_object.matrix_world.translation
            focus_distance = (target_location - camera_location).length

            camera.data.dof.focus_distance = focus_distance
            print(f"Focus distance updated to: {focus_distance}")

        # Update the last known focus object
        last_focus_object = current_focus_object

def register_handlers():
    global last_focus_object
    # Initialize last focus object
    camera = bpy.context.scene.camera
    if camera and camera.data.dof.use_dof:
        last_focus_object = camera.data.dof.focus_object

    # Add handler
    bpy.app.handlers.depsgraph_update_pre.append(update_focus_distance_if_needed)
    print("Handler registered to monitor focus object changes.")

register_handlers()

Batch rename objects in Blender

Today, we will tackle an essential aspect of 3D modeling in Blender – object naming.

It’s easy to lose track of your objects’ names, especially when you’re working on a complex project. All too often, we find ourselves with a sea of objects, each bearing an unhelpful name like ‘cube’, which doesn’t do much to tell us about their function or importance in the scene.

However, fear not! Blender offers a convenient tool for mass renaming of objects, allowing you to maintain order and clarity in your work. Let’s walk through the steps.

Firstly, you need to select the objects you want to rename. If your objects are neatly organized in a collection, simply right-click on the collection and choose ‘Select Objects’. Alternatively, if you’re dealing with individual objects, click on the first object, hold down ‘Shift’, then click on the last object. This selects those two objects and all others in between.

With your objects selected, hit ‘Control’ and ‘F2’. This brings up the ‘Batch Rename’ dialogue box. Here, you’ll specify the current name string you want to change – in this case, ‘cube’ – and what you’d like to replace it with. Click ‘OK’, and voila! All your selected objects are now renamed, saving you from any future confusion.

If you ever forget the shortcut, remember that you can always find the ‘Batch Rename’ option under the ‘Edit’ menu.

That wraps up today’s tutorial! We hope you found this helpful in managing your 3D workspace. Thanks for watching and remember to subscribe for more quick and easy Blender tips. Until next time, this is One Minute Video Tutorials.com, making your Blender journey a breeze, one minute at a time.

The New Pose Library Workflow in Blender

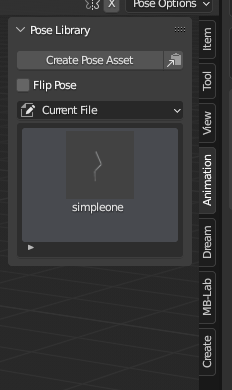
Here’s how to work with the Blender 3.4 pose library and assets browser:

Create the pose you need in pose mode. Select the bones that are required for the pose.

Save poses (still in pose mode) from the right side toolbar’s “animation” tab by clicking “Create Pose Asset”:

You can name the pose from the F9 operator dialogue.

You only need one pose for each side, since the poses can be flipped with “Flip Pose”.

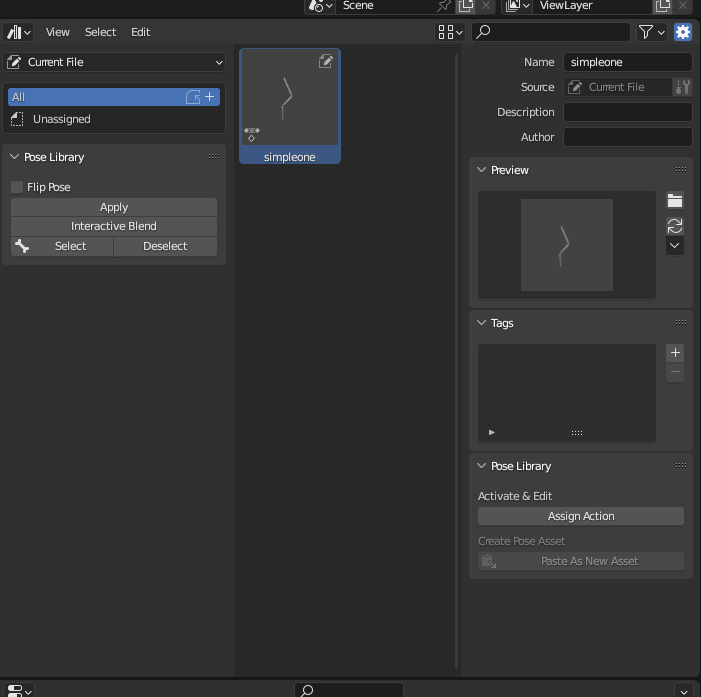
Simply click on a pose thumbnail to apply it.

You can also right click on a thumbnail to select all the pose bones.

You can click and drag on a pose thumbnail to mix between to poses.

The thumbnail from the pose is rendered from the active camera. You can later change it from the Asset Browser window if needed from the “generate preview” button:

If you want to create a global “user library”, save the .blend file in the Assets directory. By default it’s in Windows: C:\Users\myusername\Documents\Blender\Assets\

It should now show up under “user library” in the assets browser, also for any new .blend files that you create.

You can save as many files as you need to the Assets folder, and each one of them will show up in the Assets panel under “user assets”

CSS-only 3D fly-in animation

Have you ever wondered how to create a 3D-transition in which an element should fly past the camera onto the webpage? Here’s how you can do that using CSS-transforms:

See the effect in action here:

FLY IN!

<!DOCTYPE html>
<html lang="en">
<head>
    <meta charset="UTF-8">
    <meta http-equiv="X-UA-Compatible" content="IE=edge">
    <meta name="viewport" content="width=device-width, initial-scale=1.0">
    <title>Document</title>
    <style>
        body{
            perspective: 300px; /* the smaller, the stronger sense of perspective (like short focal lenght) */
            min-height: 95vh;
            display: grid;
            grid-template-columns: 1fr 1fr 1fr;
            grid-template-rows: 1fr 1fr 1fr;
            text-align: center;

        }

        h1{
            grid-column: 2/3; /* Just for putting the h1 to center of grid */
            grid-row: 2/3; /* Just for putting the h1 to center of grid */
            transform: translate3d(800px, 200px, 1500px); /* Set the start position for the element */
            animation: myflyin 2s; /* Activate the animation called myflyin */
            animation-fill-mode: forwards; /* Keep the position from the last keyfframe */
            
        }

        @keyframes myflyin { /* Define the keyframes */

            from {
                transform: translate3d(800px, 200px, 1500px); /* Starting position */
            }

            to {
                transform: translate3d(0, 0, 0); /* End position */
            }
        }
    </style>
</head>
<body>


        <h1>FLY IN!</h1>


</body>
</html>

Anyone can try NeRF now with a free app!

The 3D industry has been buzzing about Nvidia’s Instant NeRF (which stands for neural radiance fields) ever since they published their first demo video.

This technology has since been in rapid development and we now have a free iPhone app called Luma AI that anyone can use to capture NeRFs.

I tested the app with a toy robot, here’s a automatically generated video of the result:

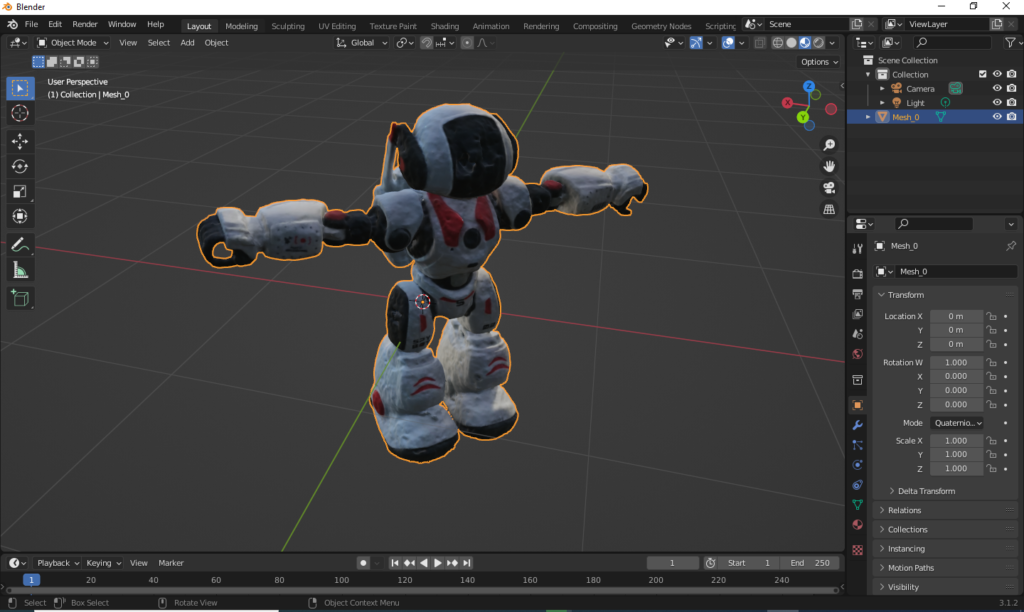
The amazing thing about NeRF renders is that they can handle light reflections and bounces in a very realistic manner. This makes it a good fit for VFX work. We can also export a textured 3D-model from the Luma AI app, but it’s not as impressive as rendering with NeRFs. It’s still quite good compared to a basic photogrammetry process, especially considering that the surface of our object was quite reflective. Here’s a screenshot from Blender:

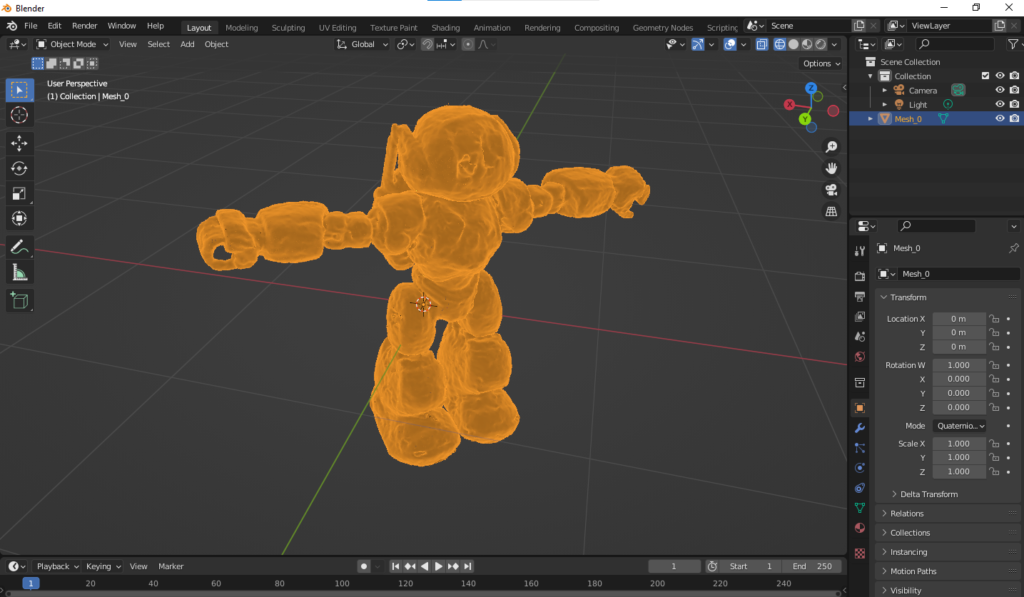
Here is how the mesh looks like (very dense):

Here’s another cool shot from a Robotime Ball Parkour toy:

@oneminutevideotutorial

Wow! NeRFs are going to be great for displaying products like this!

♬ original sound – user635578337916 –

A tool for recoloring pixel art to a new color palette

I have been searching through the webs for a long time for a good, easy to use tool for recoloring pixel art to a specified color palette. The perfect tool should make it easy and fast to test out different palettes for a provided bitmap image or a sprite sheet, but it should also make it possible to fine tune the color mappings and add new colors to the palette if needed.

This has provided to be a rather challenging task. Photoshop and other similar graphics programs do have the possibility to switch to indexed color which lets you force the image to a new color palette, but I find that workflow to be rather tedious and time consuming. Illustrator has the recolor artwork tool, but it works only with vector images.

Here are some of the tools that I did find:

Continue reading “A tool for recoloring pixel art to a new color palette”

Basics of working with timelines in Scirra Construct 3

Construct 3 has received a long-awaited feature when the Timelines got introduce a few years back. They have been built to be incredibly powerful, but getting started with timeline animation in Construct can feel confusing even for professional animators who are very familiar with concepts like keyframes and eases.

Here are the basic steps you should perform when you want to use the Timeline to create a rotation for an object:

-Right click somewhere in the layout editor and choose Timeline -new timeline

-Drag and drop an instance to the timeline

-Turn on editing (the pen icon)

-Select the instance and change it’s angle value in the properties bar

-Record this change as a keyframe by clicking on the + button to set keyframes

Here’s a few other tips:

-If you want to open the Timeline properties like the name of the Timeline, you need to click on the headers for things like the timeline name or a specific track. Then they will open up in the properties bar. Simply clicking on the Timeline bar itself is not enough.

-If you want to access the Timeline with events, you need to add the global timeline object to the project.

-You can zoom the timeline by scrolling while holding down ctrl

-To change the value of an existing keyframe, you don’t click “set keyframe” as in many other animation programs, but instead change the value, right click on the keyframe and choose “update”.

You can set any instance to play with the timeline using the “Set instance” action. Very handy for giving different objects the same animation.

One way of uniquely identifying a timeline is to give them a unique tag, possibly based on the UID of the instance involved.

If you want to do something with the instance you play with a timeline, one easy option for that is using the “system –> wait for previous actions to complete” action, which will wait for the timeline to finish and allow you to operate on the instance right after that.

One really powerful feature is the ability to add tags to master keyframes (the round ones). These tags can then be used to trigger various events in order to make things happen in sync with your animation.

Finally a sprite sheet recoloring process that works

I have been searching for a good workflow for testing out different color palettes for existing video game designs.

I have finally found a relatively pain free method of testing different color palettes and applying them to entire games. I will be making a video tutorial about this in the future, but before I get to that, I thought I would already explain the basics of the workflow.

Continue reading “Finally a sprite sheet recoloring process that works”