Free script: Easy focusing while animating a camera in Blender

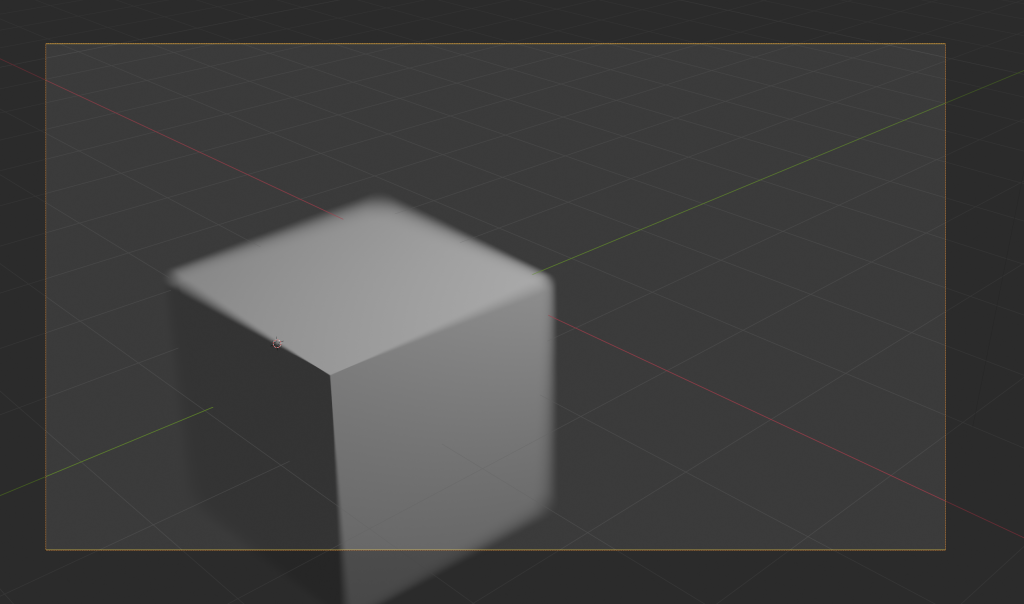
While animating a camera, it is often desirable to quickly set the focus on a specific object. The “Focus on Object” field in Blender is incredibly useful for this, allowing the quick selection of a focus object via the eyedropper tool. However, once this link is set, it remains permanent. If the link is severed, the focus on the specified object is lost. I sought a solution that would allow me to capture the correct focus distance based on the focus object before severing the link. This led me to develop a script that not only calculates but also sets the “Focus Distance” field automatically to the appropriate value. This script triggers when the focus object property changes from empty to populated. It then calculates the distance, logs it in the console, and sets the focus distance. Now, you can break the link to the focus object while retaining the focus based on the last calculated distance.
How to Use the Script:

  1. Open Blender and Set Up Your Scene: Ensure your scene contains at least one camera and other objects you might want to focus on.
  2. Open the Scripting Tab: Navigate to the ‘Scripting’ tab in Blender to access the Python console and scripting area.
  3. Paste the Script: Copy the script provided below and paste it into a new text editor within the Scripting tab.
  4. Run the Script: After pasting, run the script by pressing the ‘Run Script’ button. This will activate the script, and it will start monitoring changes to the focus object property.
  5. Use the Camera’s Focus Object Field: Go to your camera’s object data properties and under the depth of field settings, use the eyedropper to select a focus object from your scene. The script will automatically update the “Focus Distance” to match the distance to the selected object.
  6. View the Output: Check the console (located in the same Scripting tab) to see the printed focus distance. This value is also automatically set in the camera’s “Focus Distance” field.
  7. Sever the Link If Desired: You can now sever the link to the focus object without losing the focus distance, as it has been set manually based on the last calculation.
  8. Here is the script:

import bpy

# Global variable to keep track of the last focus object
last_focus_object = None

def update_focus_distance_if_needed(scene):
    global last_focus_object
    camera = scene.camera

    if camera and camera.data.dof.use_dof:
        current_focus_object = camera.data.dof.focus_object

        # Check if the focus object was None and now is set
        if last_focus_object is None and current_focus_object is not None:
            # Calculate and update the focus distance
            camera_location = camera.matrix_world.translation
            target_location = current_focus_object.matrix_world.translation
            focus_distance = (target_location - camera_location).length

            camera.data.dof.focus_distance = focus_distance
            print(f"Focus distance updated to: {focus_distance}")

        # Update the last known focus object
        last_focus_object = current_focus_object

def register_handlers():
    global last_focus_object
    # Initialize last focus object
    camera = bpy.context.scene.camera
    if camera and camera.data.dof.use_dof:
        last_focus_object = camera.data.dof.focus_object

    # Add handler
    bpy.app.handlers.depsgraph_update_pre.append(update_focus_distance_if_needed)
    print("Handler registered to monitor focus object changes.")

register_handlers()

Batch rename objects in Blender

Today, we will tackle an essential aspect of 3D modeling in Blender – object naming.

It’s easy to lose track of your objects’ names, especially when you’re working on a complex project. All too often, we find ourselves with a sea of objects, each bearing an unhelpful name like ‘cube’, which doesn’t do much to tell us about their function or importance in the scene.

However, fear not! Blender offers a convenient tool for mass renaming of objects, allowing you to maintain order and clarity in your work. Let’s walk through the steps.

Firstly, you need to select the objects you want to rename. If your objects are neatly organized in a collection, simply right-click on the collection and choose ‘Select Objects’. Alternatively, if you’re dealing with individual objects, click on the first object, hold down ‘Shift’, then click on the last object. This selects those two objects and all others in between.

With your objects selected, hit ‘Control’ and ‘F2’. This brings up the ‘Batch Rename’ dialogue box. Here, you’ll specify the current name string you want to change – in this case, ‘cube’ – and what you’d like to replace it with. Click ‘OK’, and voila! All your selected objects are now renamed, saving you from any future confusion.

If you ever forget the shortcut, remember that you can always find the ‘Batch Rename’ option under the ‘Edit’ menu.

That wraps up today’s tutorial! We hope you found this helpful in managing your 3D workspace. Thanks for watching and remember to subscribe for more quick and easy Blender tips. Until next time, this is One Minute Video Tutorials.com, making your Blender journey a breeze, one minute at a time.

Render a folder full of STL files to PNG images

I wanted to create images out of all the STL-files I had 3D-printed so far. Here is a script that automates the process using Blender.

import bpy
import os
import math
from bpy_extras.object_utils import world_to_camera_view

def clear_scene():
    bpy.ops.object.select_all(action='SELECT')
    bpy.ops.object.delete()

def setup_camera_light():
    bpy.ops.object.camera_add(location=(0, -10, 5))
    camera = bpy.context.active_object
    camera.rotation_euler = (1.0, 0, 0)
    bpy.context.scene.camera = camera

    bpy.ops.object.light_add(type='SUN', align='WORLD', location=(0, 0, 10))
    light = bpy.context.active_object
    light.rotation_euler = (1.0, 0, 0)

def create_red_material():
    red_material = bpy.data.materials.new(name="RedMaterial")
    red_material.use_nodes = True
    red_material.node_tree.nodes["Principled BSDF"].inputs["Base Color"].default_value = (1, 0, 0, 1)
    return red_material


from mathutils import Vector

def set_camera_position(camera, obj):
    bound_box = obj.bound_box
    min_x, max_x = min(v[0] for v in bound_box), max(v[0] for v in bound_box)
    min_y, max_y = min(v[1] for v in bound_box), max(v[1] for v in bound_box)
    min_z, max_z = min(v[2] for v in bound_box), max(v[2] for v in bound_box)
    
    # Calculate object dimensions
    width = max_x - min_x
    height = max_y - min_y
    depth = max_z - min_z

    # Calculate object center
    center_x = min_x + (width / 2)
    center_y = min_y + (height / 2)
    center_z = min_z + (depth / 2)

    # Calculate distance from camera to object center
    distance = max(width, height, depth) * 2.5  # Increase the multiplier from 2 to 2.5

    # Set camera location and rotation
    camera.location = (center_x, center_y - distance, center_z + (distance / 2))
    camera.rotation_euler = (math.radians(60), 0, 0)


def import_stl_and_render(input_path, output_path):
    clear_scene()
    setup_camera_light()

    bpy.ops.import_mesh.stl(filepath=input_path)
    obj = bpy.context.selected_objects[0]

    # Set camera position based on object bounding box
    camera = bpy.context.scene.objects['Camera']
    set_camera_position(camera, obj)
    
    # Apply red material to the object
    red_material = create_red_material()
    if len(obj.data.materials) == 0:
        obj.data.materials.append(red_material)
    else:
        obj.data.materials[0] = red_material

    # Set render settings
    bpy.context.scene.render.image_settings.file_format = 'PNG'
    bpy.context.scene.render.filepath = output_path
    bpy.ops.render.render(write_still=True)
    
     # Set transparent background
    bpy.context.scene.render.film_transparent = True

    # Set render settings
    bpy.context.scene.render.image_settings.file_format = 'PNG'
    bpy.context.scene.render.filepath = output_path
    bpy.ops.render.render(write_still=True)

def render_stl_images(input_folder, output_folder):
    for root, _, files in os.walk(input_folder):
        for file in files:
            if file.lower().endswith(".stl"):
                input_path = os.path.join(root, file)
                output_file = os.path.splitext(file)[0] + ".png"
                output_path = os.path.join(output_folder, output_file)

                import_stl_and_render(input_path, output_path)

if __name__ == "__main__":

    if __name__ == "__main__":
        input_folder = "3D Prints"
        output_folder = "/outputSTL"

    if not os.path.exists(output_folder):
        os.makedirs(output_folder)

    try:
        render_stl_images(input_folder, output_folder)
    except Exception as e:
        print(f"Error: {e}")

How to use:

Save the script in a python file. You can call it for example renderSTL.py. Change the input and output folders in the script to fit your situation.

Make sure you have Blender in PATH so that you can run it by simply typing “Blender” in a command prompt. If you don’t have it in PATH, open “enviroments variables” and edit the “PATH” variable under “system”. Add the path to your Blender installation as a new path.

Open up a command line in the folder which has the proper path to your STL root folder and paste this command in:
blender –background –factory-startup –python renderSTL.py

Blender should now render images out of all your STL files in the background and save them into the output folder.

The New Pose Library Workflow in Blender

Here’s how to work with the Blender 3.4 pose library and assets browser:

Create the pose you need in pose mode. Select the bones that are required for the pose.

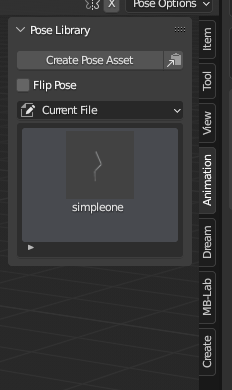
Save poses (still in pose mode) from the right side toolbar’s “animation” tab by clicking “Create Pose Asset”:

You can name the pose from the F9 operator dialogue.

You only need one pose for each side, since the poses can be flipped with “Flip Pose”.

Simply click on a pose thumbnail to apply it.

You can also right click on a thumbnail to select all the pose bones.

You can click and drag on a pose thumbnail to mix between to poses.

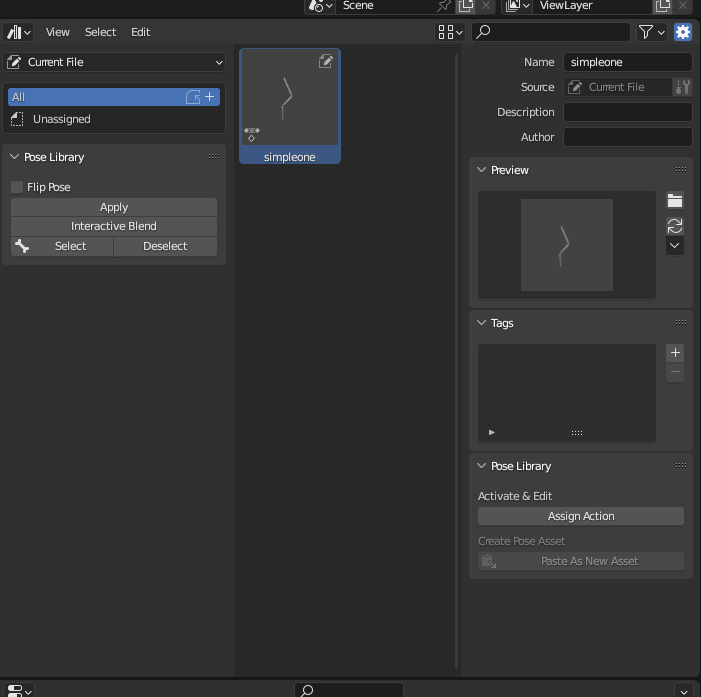
The thumbnail from the pose is rendered from the active camera. You can later change it from the Asset Browser window if needed from the “generate preview” button:

If you want to create a global “user library”, save the .blend file in the Assets directory. By default it’s in Windows: C:\Users\myusername\Documents\Blender\Assets\

It should now show up under “user library” in the assets browser, also for any new .blend files that you create.

You can save as many files as you need to the Assets folder, and each one of them will show up in the Assets panel under “user assets”

Anyone can try NeRF now with a free app!

The 3D industry has been buzzing about Nvidia’s Instant NeRF (which stands for neural radiance fields) ever since they published their first demo video.

This technology has since been in rapid development and we now have a free iPhone app called Luma AI that anyone can use to capture NeRFs.

I tested the app with a toy robot, here’s a automatically generated video of the result:

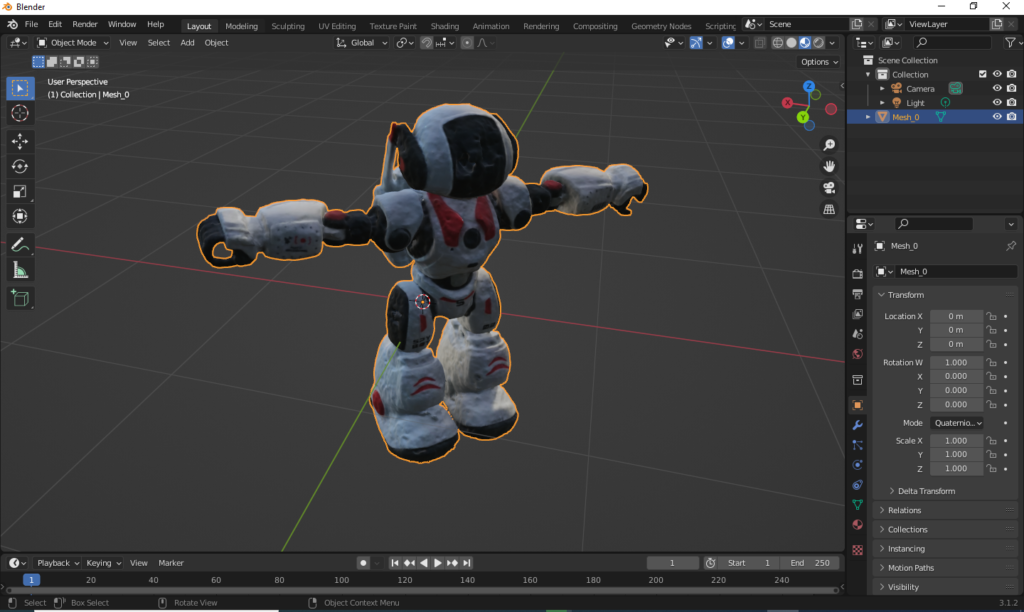
The amazing thing about NeRF renders is that they can handle light reflections and bounces in a very realistic manner. This makes it a good fit for VFX work. We can also export a textured 3D-model from the Luma AI app, but it’s not as impressive as rendering with NeRFs. It’s still quite good compared to a basic photogrammetry process, especially considering that the surface of our object was quite reflective. Here’s a screenshot from Blender:

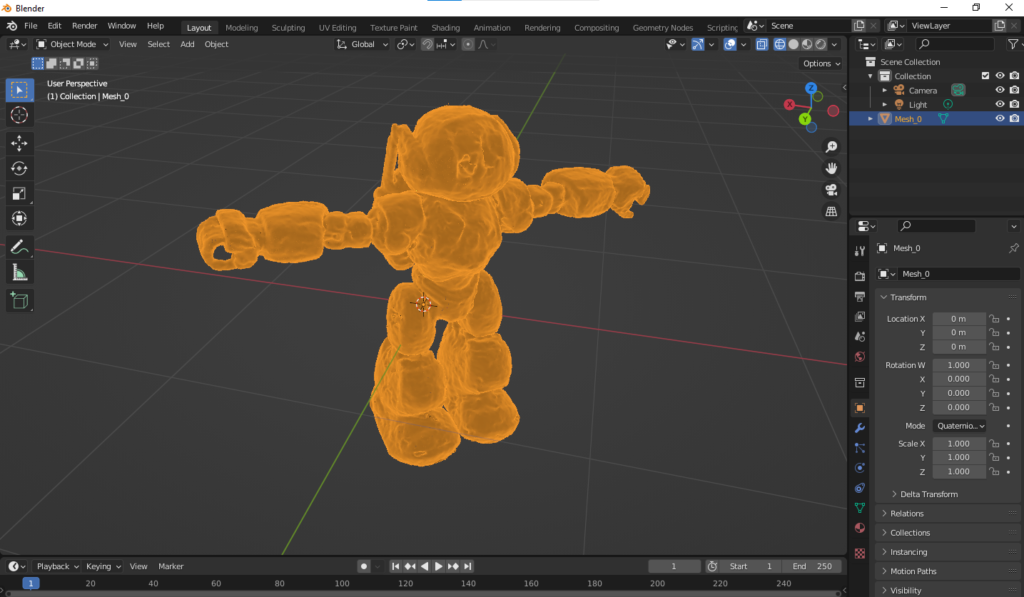
Here is how the mesh looks like (very dense):

Here’s another cool shot from a Robotime Ball Parkour toy:

@oneminutevideotutorial

Wow! NeRFs are going to be great for displaying products like this!

♬ original sound – user635578337916 –

Best free 3D-scanning app for iPhone in 2023

I have been testing out a lot of 3d-scanning apps for my iPhone 12 Pro recently. The Lidar sensor on the phone was one of the major reasons why I decided to make at least a temporary switch from the Android ecosystem to the iOS world. I’m especially interested in creating 3d-versions (or digital twins) of different rooms and spaces. Here are some of the apps I have already tried:

DotProduct ios app

3D Scanner app

Scandy Pro

Qlone

Kiri Engine

Widar

RTAB-Map

3D Scanner

Scaniverse

Modelar

Polycam

RoomScan

Pix4DCatch

Metascan

Heges

Trinio

ItSeez3D (iPad only)

Most of the apps in the list use the freemium model, where you can do a basic scan for free, but in-app purchases are often required at the export stage. There were two exceptions that were free from start to finish:

3D Scanner App and RTAB-Map of which the latter is open source.

I did some scans of the same space with both apps and the process was quite enjoyable with both. The quality was however somewhat more limited with the 3D Scanner App and in the end I was able to to get best results with RTAB-Map. So out of these scanner apps that I tested I would recommend RTAB-Map. It has versions not only for iPhone, but turns out it’s a very versatile app used for many purposes and it has also desktop releases for the major operating systems, including Windows, Mac and Linux.

I did experience some problems when I tried to do a really detailed scan. RTAB-map probably ran out of memory on my iPhone and crashed quite frequently when post-processing the scans. Luckily it turns out that you can simply export the database from the iPhone in order to do the processing on the desktop version instead. It might not be obvious at first how the RTAB-Map database can be accessed or exported on the iPhone, but you simply need to long-press on a scan in the library and choose “share”.

After you haved shared your database and downloaded it to your desktop computer, you can simply import it to the desktop version of RTAB-Map. I must say I found the interface to be rather confusing. For example, when I was looking for the option to export a textured mesh, the way to do it was to choose the “export 3d clouds” option, although one might thing that a mesh is not exactly a “cloud”. And there wasn’t a typical option to just “export a textured mesh” but you have to check the “meshing” checkbox and then the “texturing” checkbox for the texture options. And after that I actually had to close and the re-open the export to be able to see the “save” button. So quite quirky, but it worked out well in the end.

One more piece of information I want to share about using the RTAB-map on the iPhone: one time I had it crash right after a scan and at first I thought the scan had disappeared completely but after some searches in the “issues” page of their Github, I found out that some kind of recovery might be possible in the latest version. The problem was that I just couldn’t find any recovery option in the app interface. Finally I gave up and decided to do a rescan and when I chose to do a new scan, that’s when the recovery dialogue for the previous scan finally appeared and I was able to recover my crashed scan.

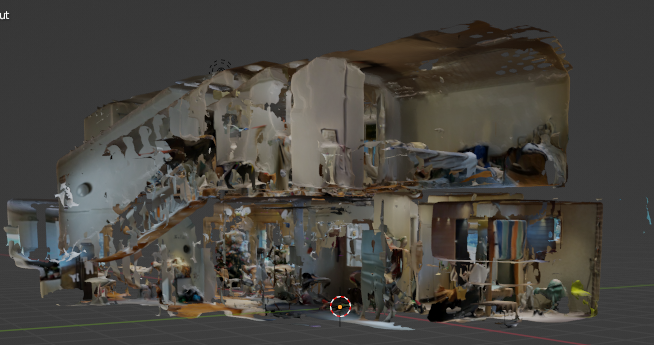
Two story house scanned with 3D Scanner App

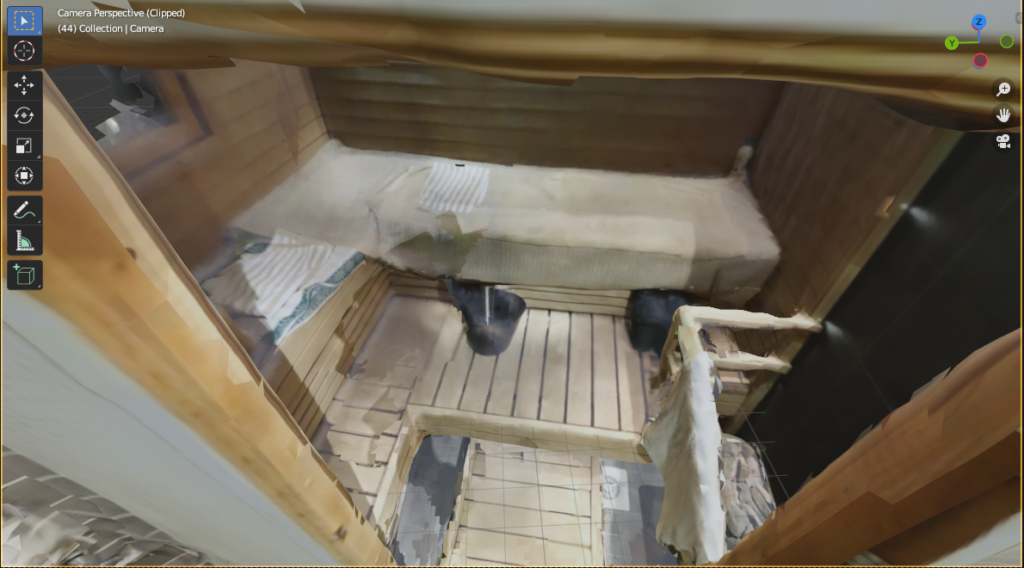
Sauna scanned with RTAB-Map

Open source tool for viewing e57 files

If you are working with laser scans and lidar data, the chances are you have bumped into e57-files, which are often used for point clouds.

Finding a good tool for opening the e57-files can be a challenge, since many of the solutions are proprietary and quite expensive.

Luckily, there is an open source tool that can import many different data formats, including e57-files. It’s called Meshlab and it has builds for Windows, Mac and Linux. The ability to open e57-files was added to the program quite recently, but it works well.

Check out Meshlab here:

https://www.meshlab.net/

Blender keyboard shortcuts for working with nodes

Being able to work efficiently with different kinds of nodes in Blender is becoming increasingly important. These basic node related keyboard shortcuts should work in all of the Node editors in Blender including material nodes, the compositor and geometry nodes.

Add new node: shift+A

Just like you can add new objects with shift+a, the same shortcut also works for adding new nodes. If you want to immediately enter the search mode, read about the next shortcut below.

Add new node and search immediately: shift+A, then S

If you want to search for the name of the node instead of browsing through the categories, hit s immediately after hitting shift+a and it will take you to the search bar.

Disable a node: M

Sometimes you just want to see the results of a node tree without a certain node. In that case you can easily mute a node by selecting it and hitting M on your keyboard.

Delete a node: X

Just like you would expect, hitting X on the keyboard will delete the selected node(s).

Delete with reconnect: ctrl+X

If you want to delete a node in the middle of a node tree and automatically connect the node that came before the deleted node to the node where the deleted node was connected to, simply hit ctrl+X to delete the node from between.

Backdrop Zoom: V and alt+V

If you need to zoom out of the backdrop image to see it completely, just hit V on the keyboard. Zoom in by pressing alt+V.

Duplicate a node: shift+D

To make a duplicate of the selected node(s), just hit shift+D on the keyboard.

Connect a node to the viewer: ctrl+shift+leftclick

If you want to quickly connect a node’s output to the viewer node to see the result of the node, just hold down shift and control and left-click on the node you want to connect.

Cut a node connection: ctrl+rightclick-drag

If you want to cut a node connection, hold down control and the right mouse button and drag over the connection line.

Collapse node: H

Sometimes you want to collapse a node so that it takes less space. To do that, simply select the node and hit H on your keyboard and the node inputs will no longer be visible. If you want to reopen a collapsed node, simply hit H again.

Create node group: ctrl+G

Grouping nodes together allows you to simplify your node trees. By grouping several nodes together it is like combining them so that they appear to be just a single node. Simply select the nodes that you want to group together and hit ctrl+G. Note that all node types cannot be grouped together. For example you can’t put the “render layers” node in a node group.

Enter or exit node group: tab

After grouping nodes, Blender will automatically take you inside the group. To exit the node group, press tab on the keyboard. Similarly, to enter a node group, select the group and press tab.